7 Mistakes You’re Making with Wall Slides (and How to Fix Them for Better Shoulder Recovery)
How would you feel if you could recover faster from an injury and finally regain that full range of motion in your shoulders? If you have been struggling with impingement, rotator cuff issues, or general stiffness, you have likely been told to perform wall slides. They are a staple in physical therapy for a reason: they work. But here is the catch: most people are doing them wrong.
I am Tibs Parise, a consultant here at CLAYER, and I see athletes and fitness enthusiasts making the same technical errors every single day. When you perform a movement incorrectly, you are not just wasting time; you might actually be reinforcing the very patterns that caused your injury in the first place.
7 Mistakes You're Making with wall slides could be the hidden barrier between you and a pain-free life. In this guide, we are going to break down these common pitfalls and show you how to optimize your recovery using the power of professional-grade French healing clay.
Why Wall Slides Matter for Your Shoulders
Before we dive into the mistakes, let’s talk about why this move is essential. Wall slides target the serratus anterior and the lower trapezius: muscles that are crucial for "scapulohumeral rhythm." This is just a fancy way of saying how your shoulder blade and arm bone move together. When this rhythm is off, your shoulder gets "pinched," leading to inflammation and pain.
1. Letting Your Shoulders Shrug Up
The most common mistake people make is allowing their upper traps to take over. When you slide your arms up the wall, your shoulders should not move toward your ears. If they do, you are reinforcing tension in your neck and upper back.
The Fix: Actively pull your shoulder blades back and DOWN throughout the exercise. Imagine you are trying to tuck your shoulder blades into your back pockets. Keep this position constant as you slide your arms upward. YOU ARE BUILT TO STEP OUT OF YOUR COMFORT ZONE, but do it with the right form!
2. Losing Contact with the Wall
The wall is there for a reason: it provides tactile feedback. Many people find that as their arms go higher, their wrists or elbows start to lift off the surface. This usually happens because of tight lats or a lack of thoracic (mid-back) mobility.
The Fix: Only slide your arms as high as you can while maintaining complete contact. If your hands leave the wall, you have gone too far. Quality always beats quantity.

3. Moving Like You are in a Race
We get it: you’re busy. But rushing through your reps is a recipe for poor muscle activation. Wall slides are about control and "time under tension."
The Fix: Perform every rep slowly and deliberately. Take three seconds to go up and three seconds to come down. Focus on the feeling of your shoulder blades rotating smoothly along your ribcage.
4. Losing Band Tension
If you are using a resistance band (which we highly recommend for advanced recovery), you cannot let it go slack. Slack means your external rotators have turned off.
The Fix: Maintain GENTLE BUT CONSISTENT TENSION on the band. Keep your wrists at least parallel or slightly wider than your elbows. This engages the rotator cuff muscles that stabilize the joint.
Get our Free Guide on Safe Clay Use + 10% off your first order. [Sign up here!]
SHOP THE SOLUTION: BETTER THAN BIOFREEZE
When you are working through these mistakes, your shoulders will get sore. Most people reach for Biofreeze, but did you know Biofreeze is often just a chemical mask?
| Feature | CLAYER Recovery Clay | Biofreeze |
|---|---|---|
| Ingredients | 100% Natural French Healing Clay | Chemicals, Menthol, Isopropyl Alcohol |
| Action | Draws out toxins & reduces inflammation | Numbs the skin surface |
| Safety | CERTIFIED NON-TOXIC & Lead-Free | Contains synthetic dyes |
| Professional Use | Trusted by Pro Athletes & Doctors | Mass market retail |
PRIORITIZE YOUR HEALTH AND WELL-BEING! Why settle for a chemical "cool" when you can use an ancestral remedy that actually heals the tissue?
Shop CLAYER Active Recovery Now
5. Poor Scapular Positioning During Ascent
Your shoulder blades shouldn't stay glued in one spot. They need to rotate upward to clear space for the arm bone. If you keep them pinned down too hard, you’ll actually cause impingement.
The Fix: As you slide up, allow the shoulder blades to naturally rotate upward and outward. At the very top, try a small "liftoff" where your hands come off the wall for a second to engage the low traps even further.
6. Internal Rotation of the Hands
As people reach the top of the slide, their palms often want to turn inward toward each other. This is a sign of tight internal rotators (like your chest and lats) winning the battle.
The Fix: Keep your palms facing each other or slightly turned out. Force those external rotators to work. This opens up the shoulder joint and prevents the "pinching" sensation.
7. Arching Your Lower Back
If you have stiff shoulders, your body will try to "cheat" by arching your lower back to get your arms higher. This takes the focus off the shoulders and puts unnecessary stress on your spine.
The Fix: Engage your core! Keep your lower back pressed firmly against the wall (or very close to it). Perform a slight chin tuck to keep your neck aligned. If you can't go higher without arching, then you’ve reached your current limit: and that’s okay.

How CLAYER Supports Your Shoulder Recovery
Fixing your form is half the battle. The other half is managing the physiological stress of recovery. When you perform physical therapy movements like wall slides, you are creating micro-trauma in the tissues to stimulate growth and repair. This leads to inflammation.
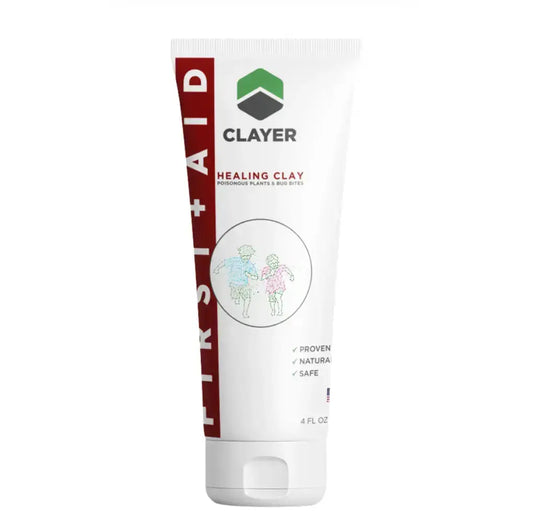
This is where CLAYER comes in. Our Active Recovery Clay is not just another topical cream. It is a scientifically-backed, mineral-rich compound that absorbs toxins and provides the essential minerals your tendons and muscles need to repair.
Why Certified Non-Toxic Matters
You might see "green clay" in health stores, but be careful. Many cheap clays are not tested for heavy metals. A study published in the Journal of Toxicology highlighted that some clays contain high lead levels.
CLAYER is CERTIFIED NON-TOXIC and lead-free. We source our clay from specific regions in France where the mineral composition is pure and potent. When you apply CLAYER to your shoulder after a session of wall slides, you are using a product that is PROVEN to kill bacteria and reduce swelling without the side effects of NSAIDs or chemical gels.
What the Pros Say
Don't just take my word for it. We are proud to be recommended by sports doctors and trusted by professional athletes. From mountain bikers to golfers, champions choose CLAYER because it works faster and safer than the alternatives.
"Recovery is the secret weapon of every champion. If you aren't recovering, you aren't progressing."
The Ultimate Recovery Protocol
To get the most out of your wall slides and fix those shoulder issues for good, follow this 3-step protocol:
- Prep: Do 3 sets of 10 controlled wall slides, focusing on the 7 fixes mentioned above.
- Apply: Immediately after your session, apply a thin layer of CLAYER Recovery Clay to the front, side, and back of your shoulder.
- Recover: Let it sit for 15-20 minutes while the clay draws out the heat and inflammation. Rinse with water.
TAKE ADVANTAGE OF OUR EXCLUSIVE OFFER!
We want you to experience the difference that real, professional-grade clay makes. We are currently offering a BUY 2 GET 1 FREE bundle on all our active recovery products.
CLAIM YOUR 2+1 FREE BUNDLE NOW

Summary of the 7 Fixes
- Don't Shrug: Keep shoulders away from ears.
- Stay Glued: Keep elbows and wrists on the wall.
- Slow Down: Control the tempo.
- Keep Tension: If using a band, don't let it go slack.
- Rotate Up: Let the shoulder blades move naturally.
- External Rotation: Keep hands from diving inward.
- Flat Back: Don't arch your spine to cheat the range.
Recovery is a journey, not a sprint. By combining proper biomechanics with the ancestral wisdom of French healing clay, you are giving your body the best possible chance to heal. Whether you are dealing with chronic pain or just want to maintain peak performance, CLAYER is here to help you stay in the game.
What about you? Are you ready to stop masking the pain and start healing?
SHOP NOW AND SAVE:
GUARANTEED OR MONEY BACK. We believe in our products because we use them every day. Join the CLAYER community and see why we are the #1 choice for natural recovery worldwide.
STAY STRONG. RECOVER FASTER. CHOOSE CLAYER.